Electrical problems in the home can be frustrating and dangerous. While some issues may require the expertise of a licensed electrician, there are several common electrical problems that homeowners can identify and fix themselves. In this blog, we’ll explore how to identify and fix common electrical problems in your home.
Identifying Electrical Problems
Before attempting any electrical repairs, it’s important to identify the source of the problem. Here are some common electrical issues to look out for:
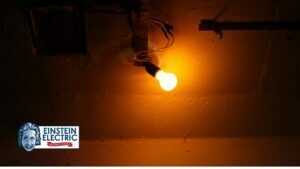
- Flickering Lights
Flickering lights can be a frustrating issue in any space, whether it’s a home, office, or public area. There are several possible causes for this phenomenon. One common reason is a loose bulb, which can easily be fixed by ensuring it is tightly screwed in. If tightening the bulb doesn’t solve the problem, the issue may lie with a faulty fixture. In such cases, replacing either the bulb or the entire fixture might be necessary to restore stable lighting. However, if flickering persists even after these steps, it indicates a potential wiring problem. Addressing wiring issues requires the expertise of a licensed electrician who can thoroughly inspect the electrical system to identify and resolve any underlying problems. Electrical safety is paramount, so it is crucial to seek professional assistance when dealing with flickering lights that are not easily remedied.
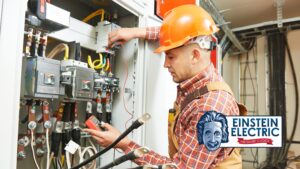
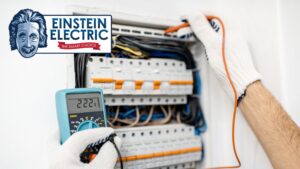
- Circuit Breaker Tripping
When a circuit breaker repeatedly trips, it indicates an underlying issue that needs attention. The two main causes of circuit breaker tripping are an overload and a short circuit. An overload happens when there are too many electrical devices drawing power from a single circuit, exceeding its capacity. To resolve this, it’s important to unplug some devices or redistribute them to different circuits to balance the electrical load.
A short circuit occurs when a hot wire comes into contact with a neutral wire or ground wire, causing a surge of electricity that triggers the circuit breaker. Short circuits can be caused by damaged or frayed wiring, faulty outlets, or malfunctioning appliances. It’s crucial to identify the source of the short circuit and repair the wiring or replace the faulty components. However, working with electrical systems can be dangerous, so it’s advisable to consult a licensed electrician for proper diagnosis and repair.
In some cases, circuit breakers may trip due to other factors, such as a faulty breaker itself or a ground fault. If the issue persists or is not easily identifiable, it’s always best to seek professional help. Circuit breaker tripping serves as a safety mechanism to protect against electrical hazards, so addressing the root cause is essential for maintaining a safe and functional electrical system.
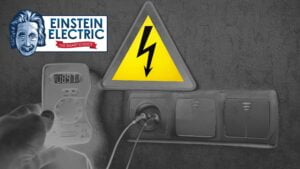
- Electrical Shocks
Experiencing an electrical shock when coming into contact with an appliance or outlet can be a distressing and potentially dangerous situation. In most cases, electrical shocks occur as a result of a grounding issue. Grounding is a vital safety measure that directs excess electrical current into the ground, preventing it from passing through a person’s body.
To address electrical shocks, it is crucial to ensure that all appliances and outlets are properly grounded. Check for any loose or disconnected grounding wires and make sure they are securely connected. If you suspect an issue with the grounding of a specific appliance, consult the manufacturer’s instructions or contact a professional technician for assistance.
Additionally, it’s important to inspect the wiring in your home or building. Damaged or outdated wiring can increase the risk of electrical shocks. If you notice any frayed or exposed wires, it’s essential to have them replaced or repaired by a licensed electrician to maintain a safe electrical system.
Prevention is key when it comes to electrical shocks. Be cautious when handling electrical appliances and always ensure your hands are dry before touching them. It’s also advisable to use outlets equipped with ground fault circuit interrupters (GFCIs) in areas where water is present, such as kitchens, bathrooms, and outdoor spaces, as these devices provide an extra layer of protection against electric shocks.
If you have experienced a severe electrical shock or are uncertain about addressing grounding issues yourself, it is recommended to seek professional help from a licensed electrician. Your safety and well-being should always be the top priority when dealing with electrical matters.
Fixing Electrical Problems
Once you’ve identified the source of the electrical problem, it’s important to fix it safely and correctly. Here are some common electrical repairs you can make yourself:
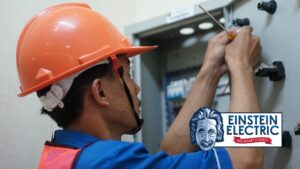
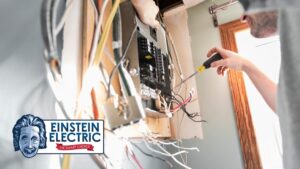
- Replacing a Light Switch
When a light switch becomes faulty, replacing it is a straightforward process that can easily be done by following a few steps. Prior to starting any work, ensure your safety by turning off the power to the circuit. Locate the corresponding circuit breaker in your electrical panel and switch it off.
To replace the light switch, begin by removing the cover plate. Use a screwdriver to unscrew the switch from the electrical box. Carefully pull the switch out, exposing the wiring behind it. Take note of the wire connections on the old switch.
Next, disconnect the wires from the old switch. This may involve loosening terminal screws or detaching wires from push-in connectors. Ensure the wires are secure and not damaged. Then, attach the wires to the corresponding terminals on the new switch, ensuring that the wire colors match appropriately.
Once the new switch is securely wired, gently push it back into the electrical box. Use screws to fasten the switch in place, ensuring it is level and flush with the wall. Replace the cover plate and secure it with screws.
Finally, it is crucial to turn the power back on. Return to the electrical panel and flip the circuit breaker to the “on” position. Test the new light switch by flipping it on and off to ensure it functions properly.
It is important to exercise caution and follow all safety protocols when working with electrical components. If you are uncertain or uncomfortable with any step of the process, it is recommended to consult a qualified electrician for assistance.
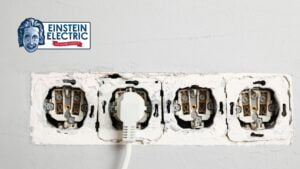
- Replacing an Outlet
When an electrical outlet becomes non-functional or loose, it is often necessary to replace it. To do so safely, follow these steps. Begin by turning off the power to the circuit by switching off the corresponding circuit breaker in the electrical panel.
With the power off, remove the cover plate by unscrewing it from the outlet. Then, unscrew the outlet from the electrical box, being careful not to touch any exposed wires. Once the outlet is loose, detach the wires from the old outlet, noting their original positions.
Attach the wires to the new outlet, ensuring that you match the wire colors correctly. Typically, black or red wires connect to the brass or gold-colored screws, white wires connect to the silver screws, and green or bare copper wires connect to the green grounding screw. Make sure all connections are tight and secure.
Carefully push the wires back into the electrical box and align the new outlet. Use screws to fasten the outlet to the box, ensuring it sits flush against the wall. Replace the cover plate and secure it with screws.
Before turning the power back on, double-check that all connections are secure and there are no exposed wires. Once verified, return to the electrical panel and flip the circuit breaker to the “on” position. Test the new outlet by plugging in a device to ensure it is functioning properly.
If you are unsure or uncomfortable with any step of the process, it is advisable to consult a qualified electrician for assistance. Safety is paramount when working with electricity, so take precautions and follow all necessary guidelines.
- Fixing a Ground Fault Circuit Interrupter (GFCI)
When a Ground Fault Circuit Interrupter (GFCI) is not functioning properly, it is crucial to address the issue promptly to maintain electrical safety. The following steps can help troubleshoot and potentially fix the problem.
First, ensure your safety by turning off the power to the circuit. Locate the corresponding circuit breaker in the electrical panel and switch it off.
Next, locate the GFCI outlet and inspect it for any visible damage. Press the “test” button on the GFCI. This should cause the reset button to pop out or trip, indicating that the GFCI has detected a fault and shut off power to the circuit.
To fix the GFCI, press the “reset” button firmly to restore power to the circuit. If the GFCI resets without tripping again and power is restored to the outlets connected to it, the issue may have been resolved.
However, if the GFCI does not reset or continues to trip immediately after resetting, it may indicate a more significant problem. In such cases, it is recommended to replace the GFCI outlet. Turn off the power at the circuit breaker, remove the old GFCI outlet, and install a new one in its place. Remember to connect the wires properly, following the manufacturer’s instructions.
After replacing the GFCI, restore power by turning the circuit breaker back on. Test the new GFCI by pressing the “test” button and ensure it trips and cuts off power to the circuit. Then, press the “reset” button to restore power.
If the problem persists or you are unsure about any step, it is advisable to seek the assistance of a qualified electrician to ensure proper diagnosis and resolution of the issue.
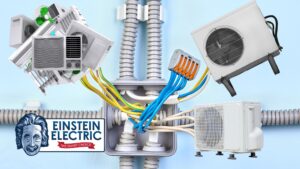
- Installing a Ceiling Fan
Installing a ceiling fan can enhance comfort and airflow in a space. To ensure a safe and effective installation, follow these steps. Before starting any work, turn off the power to the circuit by switching off the corresponding circuit breaker in the electrical panel.
Begin by installing the ceiling fan bracket to the electrical box in the ceiling. Secure it tightly using the provided screws, ensuring it is level and sturdy.
Next, attach the fan motor to the bracket, following the manufacturer’s instructions. Make sure all connections are secure and any included mounting hardware is properly used.
Connect the wires from the fan motor to the corresponding wires in the electrical box, ensuring that wire colors match (typically black to black or blue, white to white, and green or bare copper to ground). Use wire nuts to securely fasten the connections and prevent any loose or exposed wires.
Once the electrical connections are complete, attach the fan blades to the motor using the provided hardware. Ensure that the blades are securely fastened and balanced.
Before testing the fan, double-check all connections and ensure there are no loose parts. Once satisfied, turn on the power at the circuit breaker and test the fan at different speeds to ensure proper operation.
It is important to follow the manufacturer’s instructions throughout the installation process and, if needed, consult a qualified electrician or professional installer for assistance. Safety is paramount, so take necessary precautions and seek professional help if you have any doubts about your abilities to complete the installation.